Showing posts with label tutorial. Show all posts

Monday, April 2, 2012

Pin Cushion Give-Away


STITCHED workshops are still hopping! Anyone who registers for the workshop through the link below during the month of April will be entered to win the fun little pin cushion created in my March Blog Hop tutorial!

And new this month is a great workshop called The Printed Stash created by the very talented Lynn Krawczyk. You won't want to miss out on this creative adventure! (Click on her name to check out her great blog and learn more about her STITCHED workshop.)
WIN ME!

Thursday, March 29, 2012

March Tutorial Blog Hop - Recycled Wool Pin Cushion

Yay! So happy to have you visit for today's March Tutorial Blog Hop! It's been a great month of some fantastic tutorials and I'm honored to be able to wrap-up the month for you.

Surprise! My tutorial is creating with recycled wool!


I hope you enjoy this playful look at creating your very own recycled wool pin cushion. And most of all.....have fun!


Wednesday, March 28, 2012

Blog Hop Bliss

Are you itching with anticipation for the last blog hop of the month? It'll be here...tomorrow!

I'll give you a hint...it involves WOOL!  (Well, duh, huh?)  :-)

Check back tomorrow for how to make your next wool project.

March Tutorial Blog Hop month at-a-glance:
Deborah: http://deborahsjournal.blogspot.com/2012/03/hand-writing-on-fabric.html
Paula: http://paulajoerling.com/2012/03/easter-download-and-tutorial.html
Jackie: Part 1 http://stitchworks-jackie.blogspot.com/2012/03/blog-hop-tut.html and Part 2 http://stitchworks-jackie.blogspot.com/2012/03/stitched-blog-hop-tut-part-2.html
Mollie: http://wildolive.blogspot.com/2012/03/project-blog-hop-honeybee-candle-mat.html
Cindy: http://artfullivingonthebluff.blogspot.com/2012/03/march-blog-tutorial-hop-my-turn.html
Jennifer: http://sewhooked.com/2012/03/14/stitched-tutorial-blog-hop-make-an-oven-mitt/html
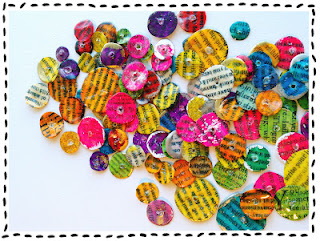
Kelli: http://ephemeralalchemy.blogspot.com/2012/03/paper-button-tutorial.html
Tracie: http://radicalrecycks.com/_blog/BLOG/post/Plastic_Egg_Transformation_Tutorial/Tracie
Alma: http://www.almastoller.blogspot.com/2012/03/how-to-make-cardboard-canvas.html
TOMORROW!! - Ann (Me!): http://thelavendartree.blogspot.com

Tuesday, March 27, 2012

March Tutorial Blog Hop - Alma Stoller

Only two more blog hop days left. Today's tutorial is from Alma Stoller and is fantastic!
Alma shares with us how to make our own canvas to work on. I love it!


March Tutorial Blog Hop month at-a-glance:
March 1: Deborah http://deborahsjournal.blogspot.com/2012/03/hand-writing-on-fabric.html
March 5: Paula http://paulajoerling.com/2012/03/easter-download-and-tutorial.html
March 6: Jackie Part 1 http://stitchworks-jackie.blogspot.com/2012/03/blog-hop-tut.html and Part 2 http://stitchworks-jackie.blogspot.com/2012/03/stitched-blog-hop-tut-part-2.html
March 8: Mollie http://wildolive.blogspot.com/2012/03/project-blog-hop-honeybee-candle-mat.html
March 13: Cindy http://artfullivingonthebluff.blogspot.com/2012/03/march-blog-tutorial-hop-my-turn.html
March 15: Jennifer http://sewhooked.com/2012/03/14/stitched-tutorial-blog-hop-make-an-oven-mitt/html
March 20: Kelli http://ephemeralalchemy.blogspot.com/2012/03/paper-button-tutorial.html
March 22: Tracie http://radicalrecycks.com/_blog/BLOG/post/Plastic_Egg_Transformation_Tutorial/Tracie
March 27: Alma http://www.almastoller.blogspot.com/2012/03/how-to-make-cardboard-canvas.html
March 29: Ann (Me!) http://thelavendartree.blogspot.com


Thursday, March 22, 2012

March Tutorial Blog Hop Day 22

Day 22!  The March Tutorial Blog Hop continues!


Today's tutorial is a must see - it's transforming plastic eggs!

Here's a nicer look at this month at a glance:
March 1: Deborah http://deborahsjournal.blogspot.com/2012/03/hand-writing-on-fabric.html
March 5: Paula http://paulajoerling.com/2012/03/easter-download-and-tutorial.html
March 6: Jackie Part 1 http://stitchworks-jackie.blogspot.com/2012/03/blog-hop-tut.html and Part 2 http://stitchworks-jackie.blogspot.com/2012/03/stitched-blog-hop-tut-part-2.html
March 8: Mollie http://wildolive.blogspot.com/2012/03/project-blog-hop-honeybee-candle-mat.html
March 13: Cindy http://artfullivingonthebluff.blogspot.com/2012/03/march-blog-tutorial-hop-my-turn.html
March 15: Jennifer http://sewhooked.com/2012/03/14/stitched-tutorial-blog-hop-make-an-oven-mitt/html
March 20: Kelli http://ephemeralalchemy.blogspot.com/2012/03/paper-button-tutorial.html
March 22: Tracie http://radicalrecycks.com/_blog/BLOG/post/Plastic_Egg_Transformation_Tutorial/Tracie
March 27: Alma http://almastoller.blogspot.com
March 29: Ann (Me!) http://thelavendartree.blogspot.com


Tuesday, March 20, 2012

Wednesday, September 8, 2010

Mr. WS Man - Snowman Ornament Tutorial

I decided to call this fella a "warm" snowman because he's surrounded by wool - thus his name - Mr. W. S. Man (W. S. = Warm Snow).


This little guy is easy-peezy to make. I've found that the most difficult part is finding the white, off-white, beige, or light gray sweaters to felt.

To begin, trace and cut two circles the same size of your main fabric. Choose any size you want your ornament to be - just remember you'll have a small seam allowance included. I use my handy left-over lid from something bought long ago.


Using an orange-ish colored piece of recycled felt, cut a lumpy carrott nose for Mr. Man. A jiggly-hand is needed for this part of the project! (You don't need to make a nose template - but I did since I was making so many.)


Hand sew on two black buttons for eyes, the carrott nose, and black yarn french knots for his smile.


Sew the two head pieces together - right sides together - leaving a small hole somewhere around the circle for turning and stuffing.

Turn head right-side out and stuff with polyfil. Stitch together stuffing hole with coordinating thread. Attach a piece of yarn/twine/ribbon/or whatever you wish to the top of ornament for hanging.

Make as many Mr. Warm SnowMen as you wish! Enjoy for yourself or as a fun gift.

Tuesday, July 27, 2010

Free Frame Cottage Garden Brief Tutorial

One of my favorite thirft shops has a free-shelf. When things have been at the store a long time and not purchased, they will put some small items on the free-shelf. As you are leaving, you are invited to check it out and grab anything that tickles your free-fancy.

A couple weeks ago, two free frames started me on a new journey.

Free frames!

See?  They really were free.

First, I primed and painted them white. I love white....and purple.
Never. I repeat, NEVER forget about purple.

I decopaged parts of the frame with rippings of pages from an old, yellowed reference manual of some sort. I am a firm believer that books should not be destroyed on purpose (or for no purpose at all!), but when I got my hands on this one, it was already in shambles - so I am ok with that.

I added a few other adornments (rub-on's, etc.) and then sprayed with two coats of poly spray. You can use any kind of poly protector, but the spray is so easy to use.

Then I prepared some "gardens" with a recycled wool blanket for the background and different flowers, stems and leaves from recycled wool. The blue flower was created using an old button and crocheting a "slipcover" for it from very thin wool yarns. I used the pre-cut cardboard that came with the frames as the backing and discarded the glass pieces. I know, you'd think I could have found some way to use them, but there's a limit to what I can save...

Waa Laa! Two new simple-chic cottage garden pictures!
The one with the blue flower was already given to a friend for her birthday and the other one is now posted on Etsy. I'm very pleased with how they turned out. Hmmm...think I might run to my thrift shop again today and see what awaits me.

Thursday, February 25, 2010

Wool Coaster Tutorial

As promised, here's a short tutorial for some fun and easy coasters.

WOOL COASTER TUTORIAL
Trace and cut 8 circles from felted sweaters. The ones I made are about 4 inches across. I use a variety of things for templates - I believe this circle template might have originally been the cover to a yummy cream cheese container (after it's washed first, of course!).

Line up and pin two circles to each other.

Using a thin yarn, stitch a blanket stitch around the outside of the circle sewing the two pieces together. Before inserting your needle to begin a new blanket stitch, slip a bead onto the needle and slide it down to snuggle up to the last stitch next to the wool. 


TIP 1: Try to estimate how much yarn will be needed for the entire coaster before cutting. It helps prevent having to knot, end off and start a new piece of yarn.

TIP 2: You can make a small knot when beginning your stitching and hide it in between the two layers of wool by catching just a snippet of wool with your needle further into the circle's center and then your next [beginning] stitch can start along the outside edge.

Finish all four coasters in the same manner and you now have a great set of sassy coasters. Set them immediately on your coffee table or use a piece of ribbon or twine to tie them together in a neat little pile. It's a great way to present them as a gift! 


Monday, February 15, 2010

Pretty Posy Tutorial

I recently saw some very pretty flowers created with organza and had to try it myself. So, I don't want anyone to think that I made up this technique - because that would be just plain lying if I said I did. :-)

I thought it would be fun to make a little tutorial of my version of the flower. I chose to use recycled fabric that I got from the thrift store some time ago. When I first saw the fabric, I didn't know what I would do with it but figured I could use it for something. Of course it was purple - so it seemed obvious to me that it would come in handy some day. It began its life as the outside layer of a shower curtain.

TUTORIAL
1. Cut 4 different sizes of circles - about 6-8 pieces of each size. A nice thing about this project and is very different from my working with wool, is that the cutting doesn't need to be perfect at all. It's actually kind of nice if they are a bit mis-shaped.

2. Grab and light one of your favorite candles. It helps if the candle matches your fabric. Oh heck, I'm just kidding - but of course MY candle would be purple!

Gently run the edges of all the cut circles through the flame of the fire to softly singe them. You can do it heavier if you like, but do keep in mind that there will be a little black on the edges from the flame. (It only took me the time of one episode of Andy Griffith to do all the tracing, cutting and flaming of the pieces.)

2. Stitch all layers of the circles together starting with the larger circles and working toward ending with the smaller ones on top. I tended to thread my circles onto the needle in a little lopsided manner to give it more character (especially with the smaller circles). In other words, don't worry about putting the needle exactly in the center of each circle.

3. When you have all circles in place, sew some fun coordinated (or mismatched!) beads in the center. The number of beads you use is totally up to you. I think I used about 8 or so. Keep in mind, that you will probably need to use beads with a little larger hole opening in order to get your needle through. (Unless you have special beading needles that are very thin. Then you can use them to sew the smaller seed beads.)

4. Cut a small circle to mount/sew the pin-back to. I used a small piece of wool (using the circle of a spool of thread for a size template.) I felt that using a stronger fabric for this part would help make it more stable. Sew the circle and pin-back in place.

5. WaaLaa! Your pin is done! Enjoy it attached to your favorite jacket, sweater, bag, scarf, hat or anything else that suits your fancy! Or do as I plan on doing - and make several in different colors and have ready for fun, quick gifts for your special friends.

PS. After I made this purple flower, I remembered that I had saved a piece of silky edging from an old yellow wool blanket that I had previously cut up for a pillow. I decided that a fun, springy flower might be a great way to use this. Thank goodness that I saved it! It just goes to show you that it IS important to save everything! I already have a big problem with hanging onto too many things. And I think it keeps getting worse every day...

PSS. The purple fabric in the photos above is all the same fabric. In an attempt to save battery life, I would turn my camera off between steps. I guess I didn't get the settings the same in all photos. Maybe one of these days I'll learn how to control that better. And then again, maybe I won't worry about it at all.

Tuesday, January 12, 2010

Sitting Pretty Chicken Paperweight Tutorial

This is officially my first tutorial. Wish me luck.

This is a tutorial for a felted wool chicken paperweight made from recycled wool sweaters. I'm still working on details of patterns and such - so I don't have the actual pattern pieces available for you - but they are simple shapes that can easily be drawn to a size that suits you. This pretty little chick happens to be approximately 5-6".

1. I wanted to do a collection of Valentine-themed chicks, so I first picked some fun sweaters in creams, pinks and reds.


2. With two basic pattern pieces - trace two of the body pieces and one of the belly piece in a different color. Since I wanted to make several at one time, I trace and cut all pieces out at the same time for all the chicks and then have fun mixing and matching the pieces together in fun ways.


3. Cut traced pieces.


4. Begin sewing with the belly piece. I usually sew one side first and then go back and pin the other pieces together at that time. You need to also pin in a small yellow piece of wool for the beak, an orange/rust colored piece of wool cut in the shape of top comb, and the fun and sassy tail. I use the "seams" of the felted wool sweaters for the tail.  First cut about 5 pieces at a length that will hang loosely from the chick. To help hold the pieces of seams together, run them through your sewing machine a few times. Then you can roll the up into a tight coil and pin in the tail area of the chick.  This is where it gets just a tad tricky - you have to be careful to keep all "inserted" pieces inside the chick and not get them caught in the seams while sewing.


5. Leave a small opening in one side of the belly area for turning and stuffing.  Turn right-side out.

6. Stuff with polyfil. Leave a small area near the closing to add some small pebbles to help weigh the chick in the belly area so she can "sit pretty".


7. Stitch the opening closed with a hidden whip stitch.


8. Add a fancy little brooch using wool, buttons, beads - anything you'd like to adorn her with.  Use small black beads for eyes.


9. Use a wool yarn or cording and a small wool bead to give her a pretty baubble necklace. Use an awl to poke a hole through the bead and carefully add a small drop of gel-superglue in the hole before poking the cord into the hole with a pin.


10. Enjoy your Sitting Pretty Chicken Paperweight!